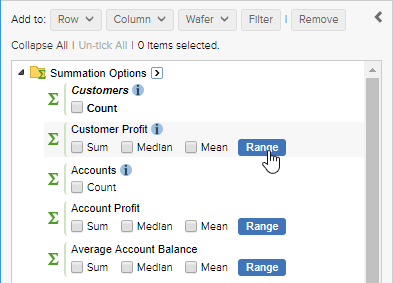
Click the Range button next to one of the Summation Options to create a range or quantile based on that summation option:
The Range dialog displays:
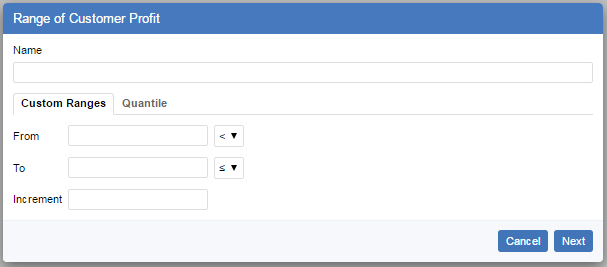
You can choose either to create a series of custom ranges or create your ranges using one of the predefined quantiles:
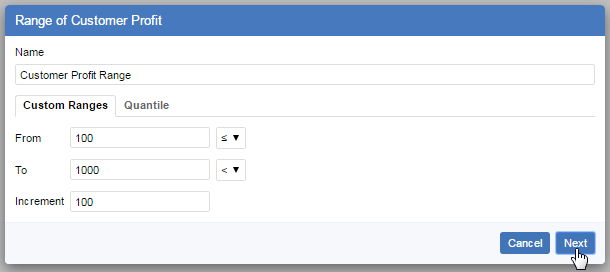
Custom Ranges
To define a series of custom ranges you need to specify the lowest and highest values in the range and an increment. SuperWEB2 will automatically create a series of ranges between the two values, with each individual range the size of the increment.
When defining the range, you need to specify what to do with values that are equal to one of the range boundaries: use the drop-down lists to select either < or ≤ for the From or To value.
When you have completed all the options, click Next. SuperWEB2 then displays the ranges you are about to create, and you can either click Create to create them, or Back to make changes.
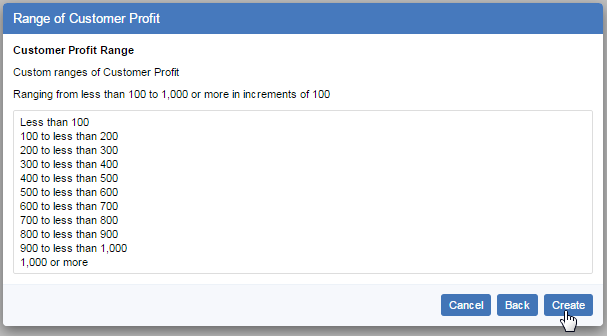
Example 1 - Include the Upper Boundary in the Range
If you set the values to:
- From: 100 <
- To: 1000 ≤
- Increment: 100
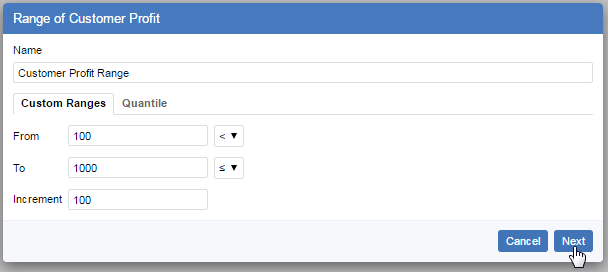
SuperWEB2 creates ranges where each range includes values that are equal to the upper range boundary:
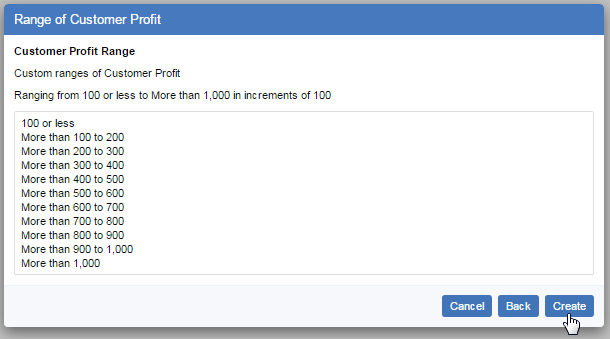
Example 2 - Include the Lower Boundary in the Range
If you set the values to:
- From: 100 ≤
- To: 1000 <
- Increment: 100
SuperWEB2 creates ranges where each range includes values that are equal to the lower range boundary:
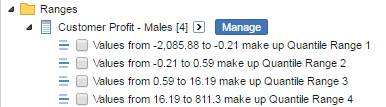
When you click Create, your range is added to the Ranges section in the customise table panel:
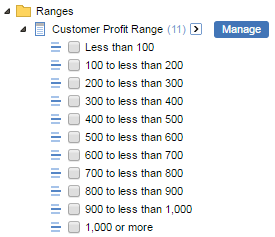
Now that you have created your range, you can add the ranges to a table.
Quantiles
To create a series of ranges using quantiles:
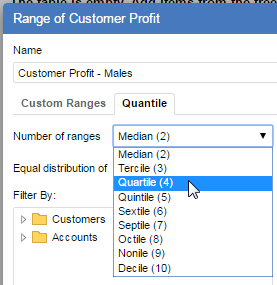
- Select the Quantile tab.
- In the Name field, enter a name for your new series of ranges (up to 25 characters long).
In the Number of ranges drop-down list, select the number of ranges you want to create. The available options will depend on how the administrator has configured the quantile settings for this dataset. For example:
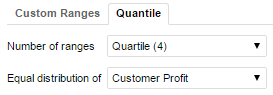
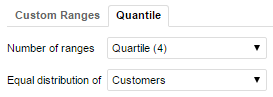
In the Equal Distribution drop-down list, select whether you want to construct the quantile ranges using the summation option or a record count.
For example:
Create four ranges based on an equal distribution of the Customer Profit summation option:
Create four ranges based on a equal distribution of the number of records in the Customers table:
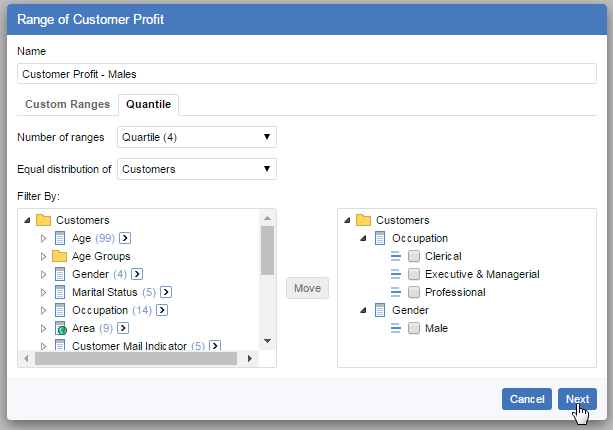
(Optionally) apply a filter:
- Select some fields from the list on the left.
- Click Move to add them to the list on the right.
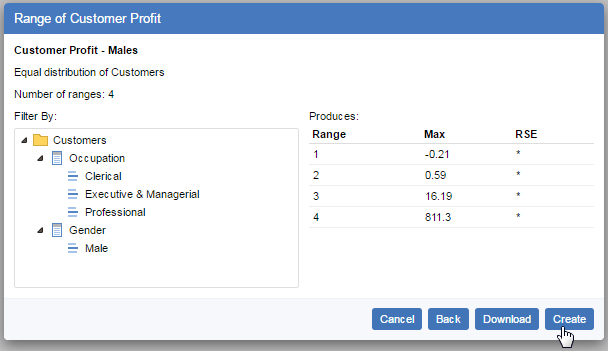
With a filter in place, the quantile will only be constructed from records that match the specified field values. For example the following quantile will only contain records for Male customers who do one of the three specified occupations:
- Click Next to review the quantile ranges.
You can then click either Create to create the ranges, or Back to make changes.
When you click Create, your quantile is added to the Ranges section in the customise table panel: